Getting clients to schedule a meeting is a way most service business owners convert website visitors. So, if you have a landing page, you’ll need an easy way to allow customers to book a call.
If you have a Smart Page, you can easily do this by using the Calendly integration. Let’s look at how you can make use of this.
Why integrate Calendly with your Smart Page?
Calendly is a simple tool that helps you automate meeting scheduling. This means it eliminates the back-and-forth emails for finding the perfect time between you and your client. Here’s how Calendly works:
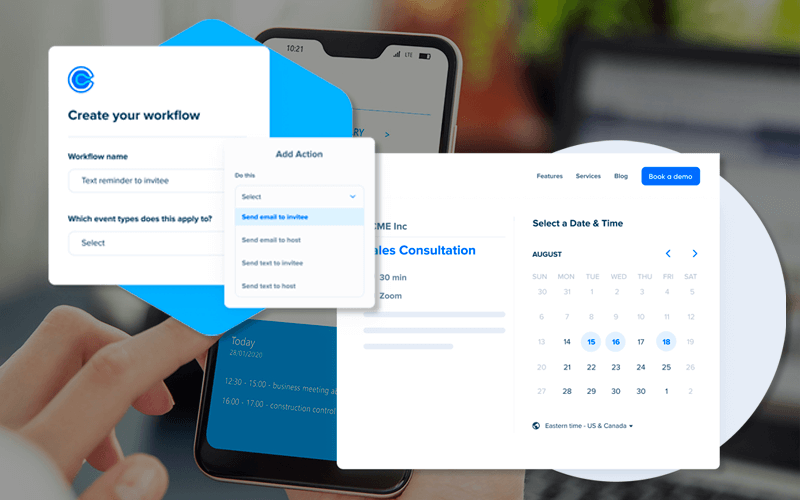
You can send your customers a Calendly link, through which they can view which time slots are available for booking a meeting. Here’s how it looks like:

You can set your available date and timings. Clients can easily view these available slots and choose the one they prefer. Then, a meeting link will be automatically generated and shared with your client.
If you’re a consultant, coach, or freelancer who wants to book meetings with clients through your Smart Page, Calendly is a must-have integration. Once you enable the integration, your Smart Page visitors can easily book appointments/meetings easily.
How to integrate Calendly on Instamojo Smart Page
You can integrate Calendly on your Smart Page in four easy steps.
Step 1: Sign in to your Instamojo dashboard
Navigate to the Smart Page section. Choose the page you want to add Calendly. From the drop-down, select ‘edit’.

Step 2: Select Calendly
Scroll down to the ‘Add-ons’ section and you’ll find the Calendly integration option.

Once you select ‘set up’, you will be re-directed to the Calendly sign up page.

If you don’t already have an account, create one, or else log in to your existing account.
You will be asked to enable the application on Instamojo. Select the ‘Connect to Calendly’ option.

You will then be re-directed to your Instamojo dashboard.
Step 3: Enable Calendly
From the Add-ons section, choose the enable button.

You will be presented with two options for where the Calendly add-on can be viewed. It can either be on your Smart Page or be visible post-purchase to customers.

Select ‘Enable Calendly’ option.
Step 4: Preview and publish
You can now preview the page and view your Calenly Add-on. Then, press ‘Publish’ or ‘Save’ and exit. Here’s how the Calendly add-on looks like if you’ve enabled it on your Smart Page:

Get Calendly integration today!
The Calendly add-on is available for all premium subscribers of Instamojo Smart Page. Embed Calendly and convert website visitors into scheduled meetings and demos.
If you haven’t upgraded to Smart Page Pro yet, this is your sign to do so!