Are you advertising on Facebook? If you are using Facebook ads to help more people discover your products/services, online store, or website, you should consider using Facebook Pixel to understand and track conversions from each ad/post. Here is a simple guide on how to use Facebook Pixel on your website and also on your Instamojo account!
What is Facebook Pixel?
Facebook Pixel is a tag (a piece of code) you put on your website so that you track multiple aspects like leads, page-views, and even conversions on a particular post or landing page from a particular ad.
It is very much like your Google Analytics code by comparison. You can set up on your website similarly to track different data aspects of people that visit your site.
How Facebook Pixel Works
Facebook pixel uses cookies to track users. It places and triggers the cookies whenever a user performs an action via the Facebook ad. It also allows you to set the actions you want to track.
What can Facebook Pixel do for me?
With Facebook pixel, you can:
- Track conversions
- Remarket to leads
- Track page views and load time of your website.
- Create new and similar audiences for your ad account that will help you run effective ads.
Types of Pixel
There are different pixels that you can set up on your website. Generally, these are subsets of a pixel. To list, here are the pixels available on your Facebook ad account.
- ViewContent – to who landed on your website, on what page, and when.
- Search – to track users that search something on your website
- addtocart – to track users that add something to the shopping cart
- InitiateCheckout – to track users that initiate a checkout flow. For instance: click a button or redirect to a landing page/form.
- AddPaymentinfo – to track users that enter their card details in the payment form/checkout flow.
- Purchase – track users that purchased something from your website.
- Lead – to track a user that expresses interest in your offer. For example: submits a form or lands on your pricing page.
- CompleteRegistration – completes the onboarding flow or submits a registration form.
Custom Conversions – Facebook also allows you to create a custom pixel to track any other aspect than the above-listed ones. Custom pixel is based on URL keywords and parameters.
Creating/Adding a Pixel on your website
Follow these steps to add a Facebook pixel on your website/online store or landing page.
STEP 1: Go to Facebook Ads Manager and locate the menu in the top left corner.
STEP 2: From the drop-down menu, click on “all tools” and click on “Pixel” under “Assets.”
STEP 3: You will be taken to the “Create Pixel” page. Click on “Create a Pixel.”
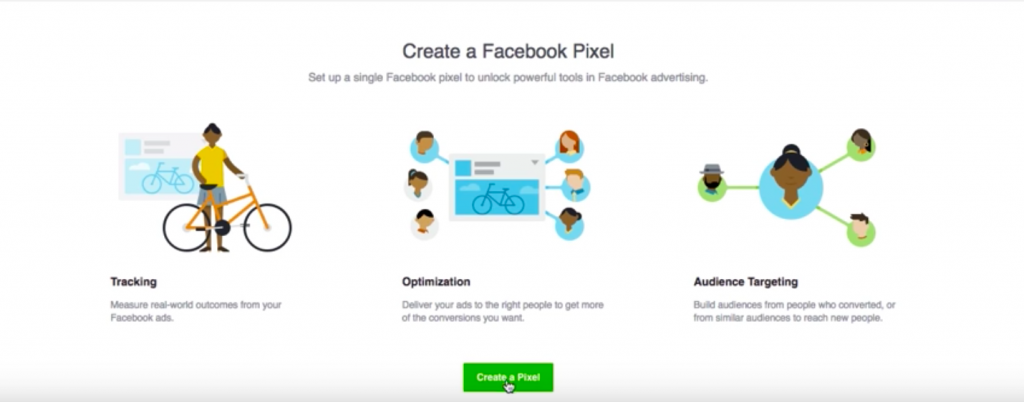
STEP 4: Name your pixel. Also, note that you can create only one pixel per ad account. Therefore, it’s best to name your pixel after the website on which you want to add the pixel.
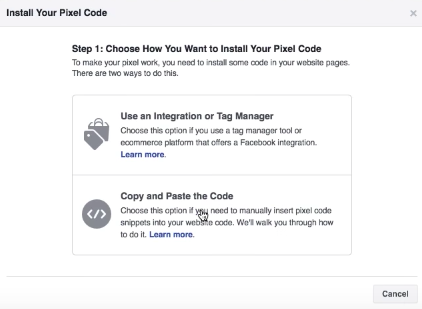
STEP 5: And you’re set. You can install the pixel on your website. There are two ways to do that. To demonstrate, let’s take a look at the Copy+Paste method of adding a pixel
STEP 6: Copy the code displayed and paste it as is under the Head tag of your website. If you are using a WordPress website then go to your dashboard and locate “Appearance” from the menu and look for the “Edit Theme” option. Then search for “header.php” and paste the code there and save it.
Your Pixel is ready to use!
Bonus tip: Download a pixel tracker browser extension to check if your pixels are working. For more information, you can watch this simple video.
How to use Facebook Pixel on your Instamojo account?
You can track users that have made a payment on Instamojo using the basic ViewContent pixel and Instamojo’s “Custom Redirect” option. The custom redirect option is available in the “Products and Store” section. Then, choose a product and proceed to the edit option. The custom redirect URL is available in Advanced Settings.
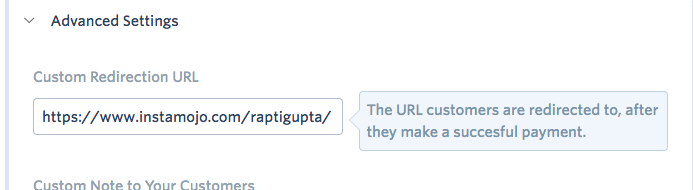
Once a customer has made a payment on Instamojo, you can choose to redirect them to a landing page of your own. You can also put a Facebook pixel on that landing page to track how many people landed on that page after making the payment.
If you’re looking for something simpler, you could opt to add Google Analytics code to your Instamojo store to track conversions.
Instamojo opens up a world of possibilities for you. You can conveniently track conversions, cart abandons, demographics, and more with Instamojo Analytics as well.
Come join the Instamojo experience today!
5 comments
Can’t find custom redirect option in Instamojo.
Please help.
This isnt working for new update can you please help?
Thank you for the great article. I just started my dropshipping using instamojo.
Thank you for your feedback and welcome to the Instamojo community.
Thanks for sharing this document illustrating step by step process, it’s very helpful